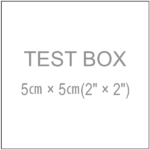
1. How to print PDF sewing patterns
The patterns from SewingTimes are available in two sizes: A4 and US Letter.
Print from a laptop or computer, not a mobile device.
Only print the page that has the 2″ test box to start – measure before printing all the pages.
Print using the actual size or 100% settings.
Print onto A4 paper or US Letter paper making sure the “fit to page” option is NOT selected.
2. Print all your pattern pages
If the printed test box is exactly 2 inches, print all your pattern pages.

3. Symbols displayed in the SewingTimes patterns
Grain Lines

These double-ended arrows tell you to place the pattern piece parallel to the selvage and along the fabric grainline.
Fold lines

The black dashed line indicates the fold lines.
Draw the pattern as is and flip the pattern. Align the center which is the dashed line draw the other half again.
Or fold the fabric and place your pattern piece on the folded edge of the fabric.
Notches

Blue star shape are called notches and indicate you need to mark these points to enable you to match up the pattern when sewing.
Match the blue lines together at the stars and sellotape together to form the whole of panel.
Do this before placing on the fold and cutting the fabrics.
Finish lines

The gray dash-single dotted line indicates the finishing line excluding the seam allowance.
Also, it is the cutting line for the interfacing that without the seam allowance.
Cutting line

The black solid line is the cutting line that includes the seam allowance.
4. How to cut the fabric and interfacing
If you have a complete pattern piece on one sheet of paper.
Place the pattern on the right side of the fabric or unglued side of the interfacing.
Draw along the border of the pattern on the fabric. Cut along the pattern you just drew.
If you do not have a complete pattern piece on one sheet of paper (if there are dashes or notches).
After you have assembled a complete pattern piece, place it on the fabric and draw it
